This is the complete guide to Loomism, a free online tool that draws Andrew Loomis's and Frank Reilly's head construction lines straight onto a photograph of a face. Everything below refers to the live app — open it in another tab and follow along.
1. What Loomism is
1.1 What it is for
Loomism draws the construction lines artists use — Andrew Loomis's method and Frank Reilly's method — directly onto a photograph of a face. Instead of measuring proportions by hand and fitting a grid to the picture, you upload a photo and get a construction already matched to that particular face at that particular angle.
It is a tool for studying and for checking your own drawings: it shows where the brow, nose and jaw lines actually fall on a given face, how the construction changes as the head tilts, and whether the proportions in your drawing agree with the reference.
1.2 How it works
When you upload a photo the application detects the facial landmarks, estimates the head's orientation in three axes and draws the construction from that. The analysis is automatic — you set nothing by hand, though every element can be corrected afterwards.
Everything is computed in your browser and on the application server; the photo is never stored permanently.
1.3 Photo requirements
| Property | Value |
|---|---|
| Formats | JPEG, PNG |
| File size | up to 15 MB |
| Dimensions | up to 8192 × 8192 px (resized to 4096 px for processing) |
| Framing | front or three-quarter view; a side profile works too |
2. Main view
2.1 Method cards
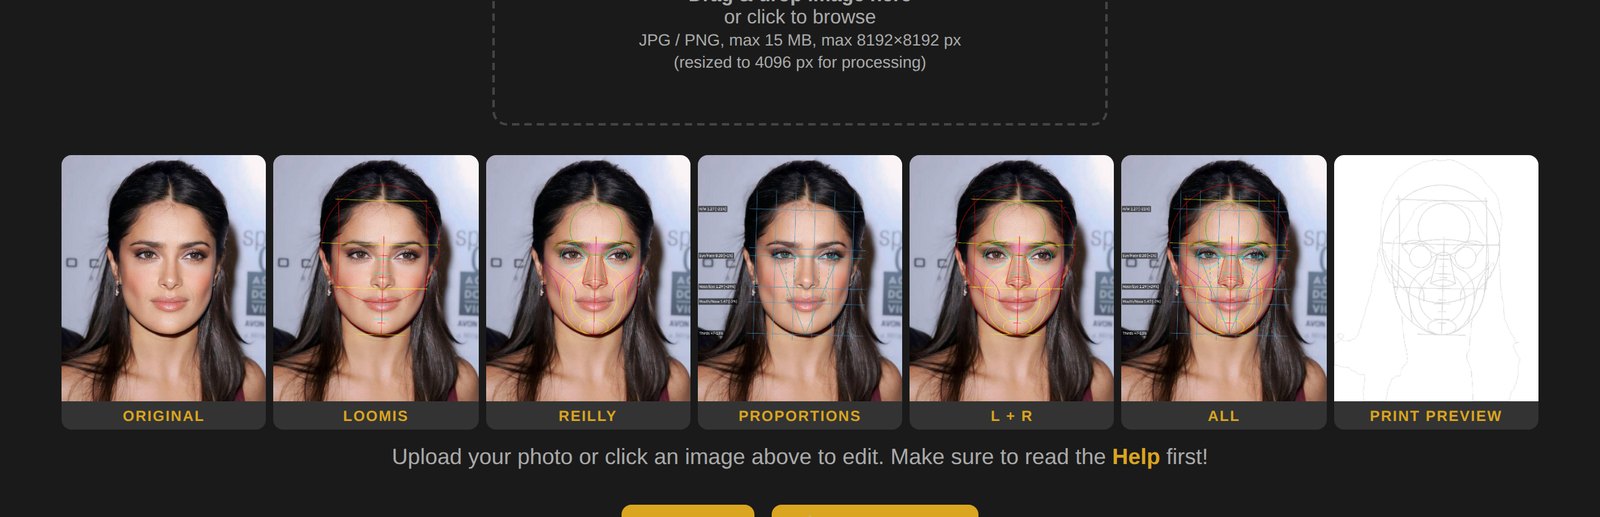
Once the photo has been processed a row of cards appears, each showing a different construction over the same photograph. Clicking a card opens the full-screen preview with the complete settings panel.
2.2 Downloading and printing
Every card has its own download button (a JPEG with the lines drawn in) and a print button. If the reference grid is switched on it is included in the downloaded file as well.
2.3 Reference grid
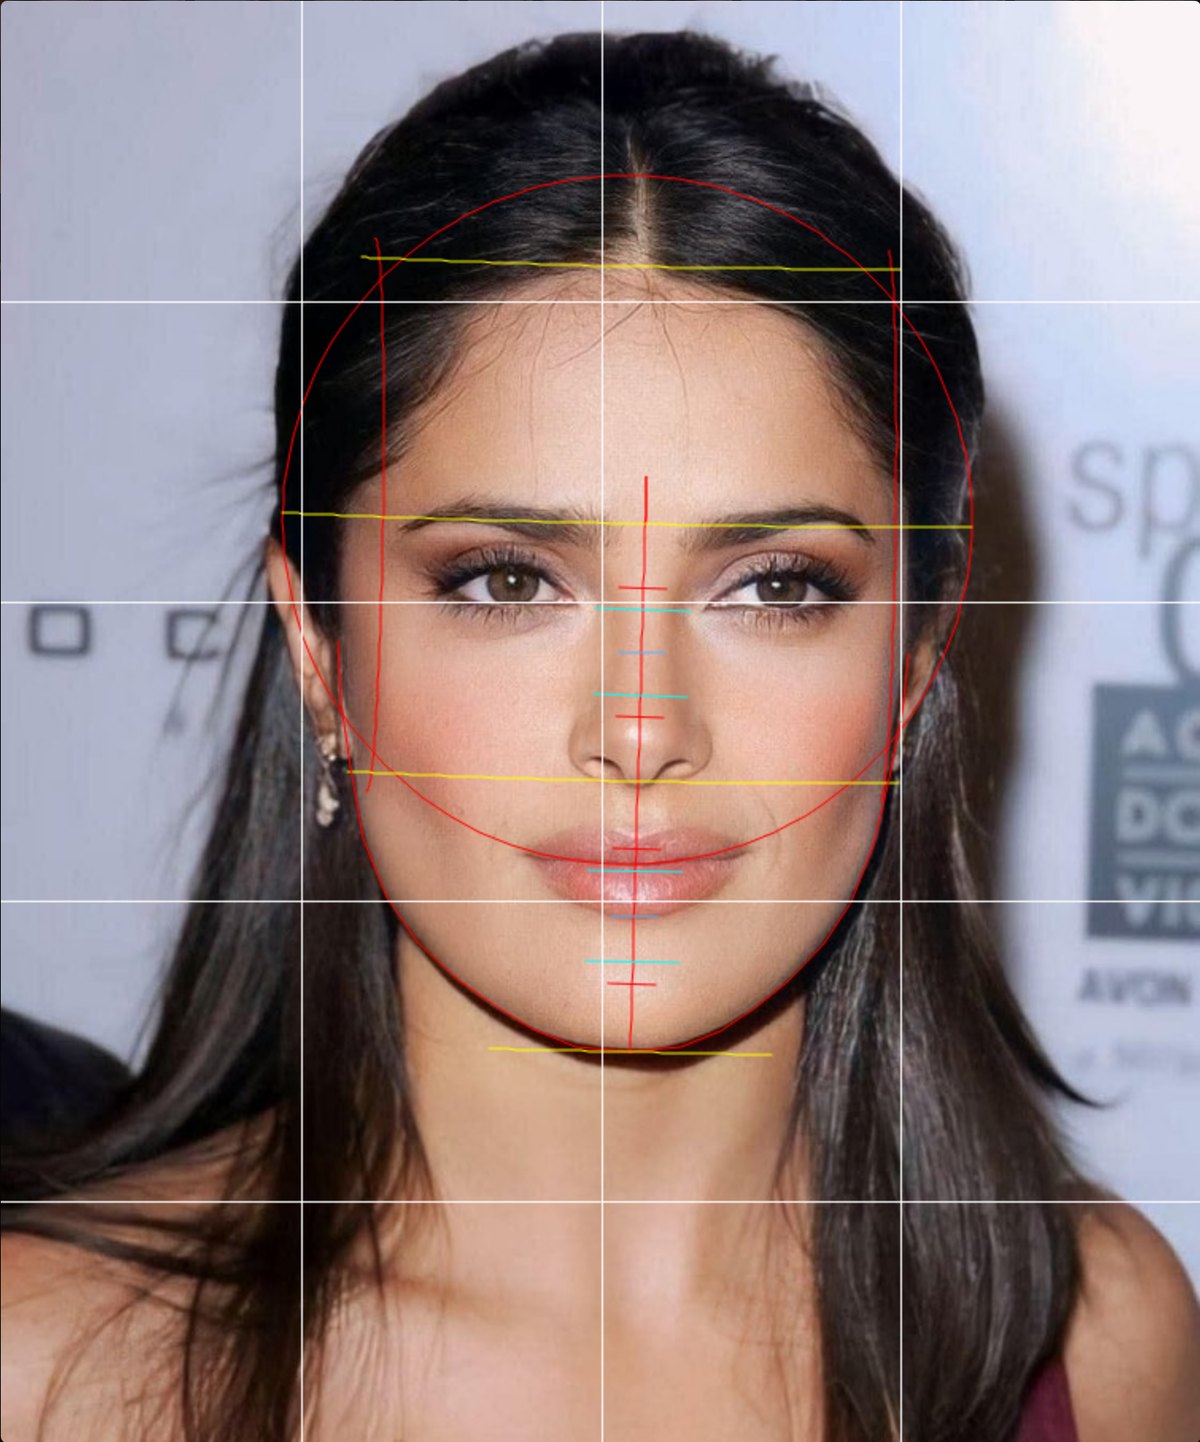
The reference grid lives in the full-screen preview — the Grid section of the MENU panel, or the G key. S and A change its density, W and Q its colour, with twelve colours in the palette and a separate opacity slider. It is there to help you transfer the drawing to paper square by square, and it goes into the downloaded file too.
3. Construction methods
3.1 Loomis
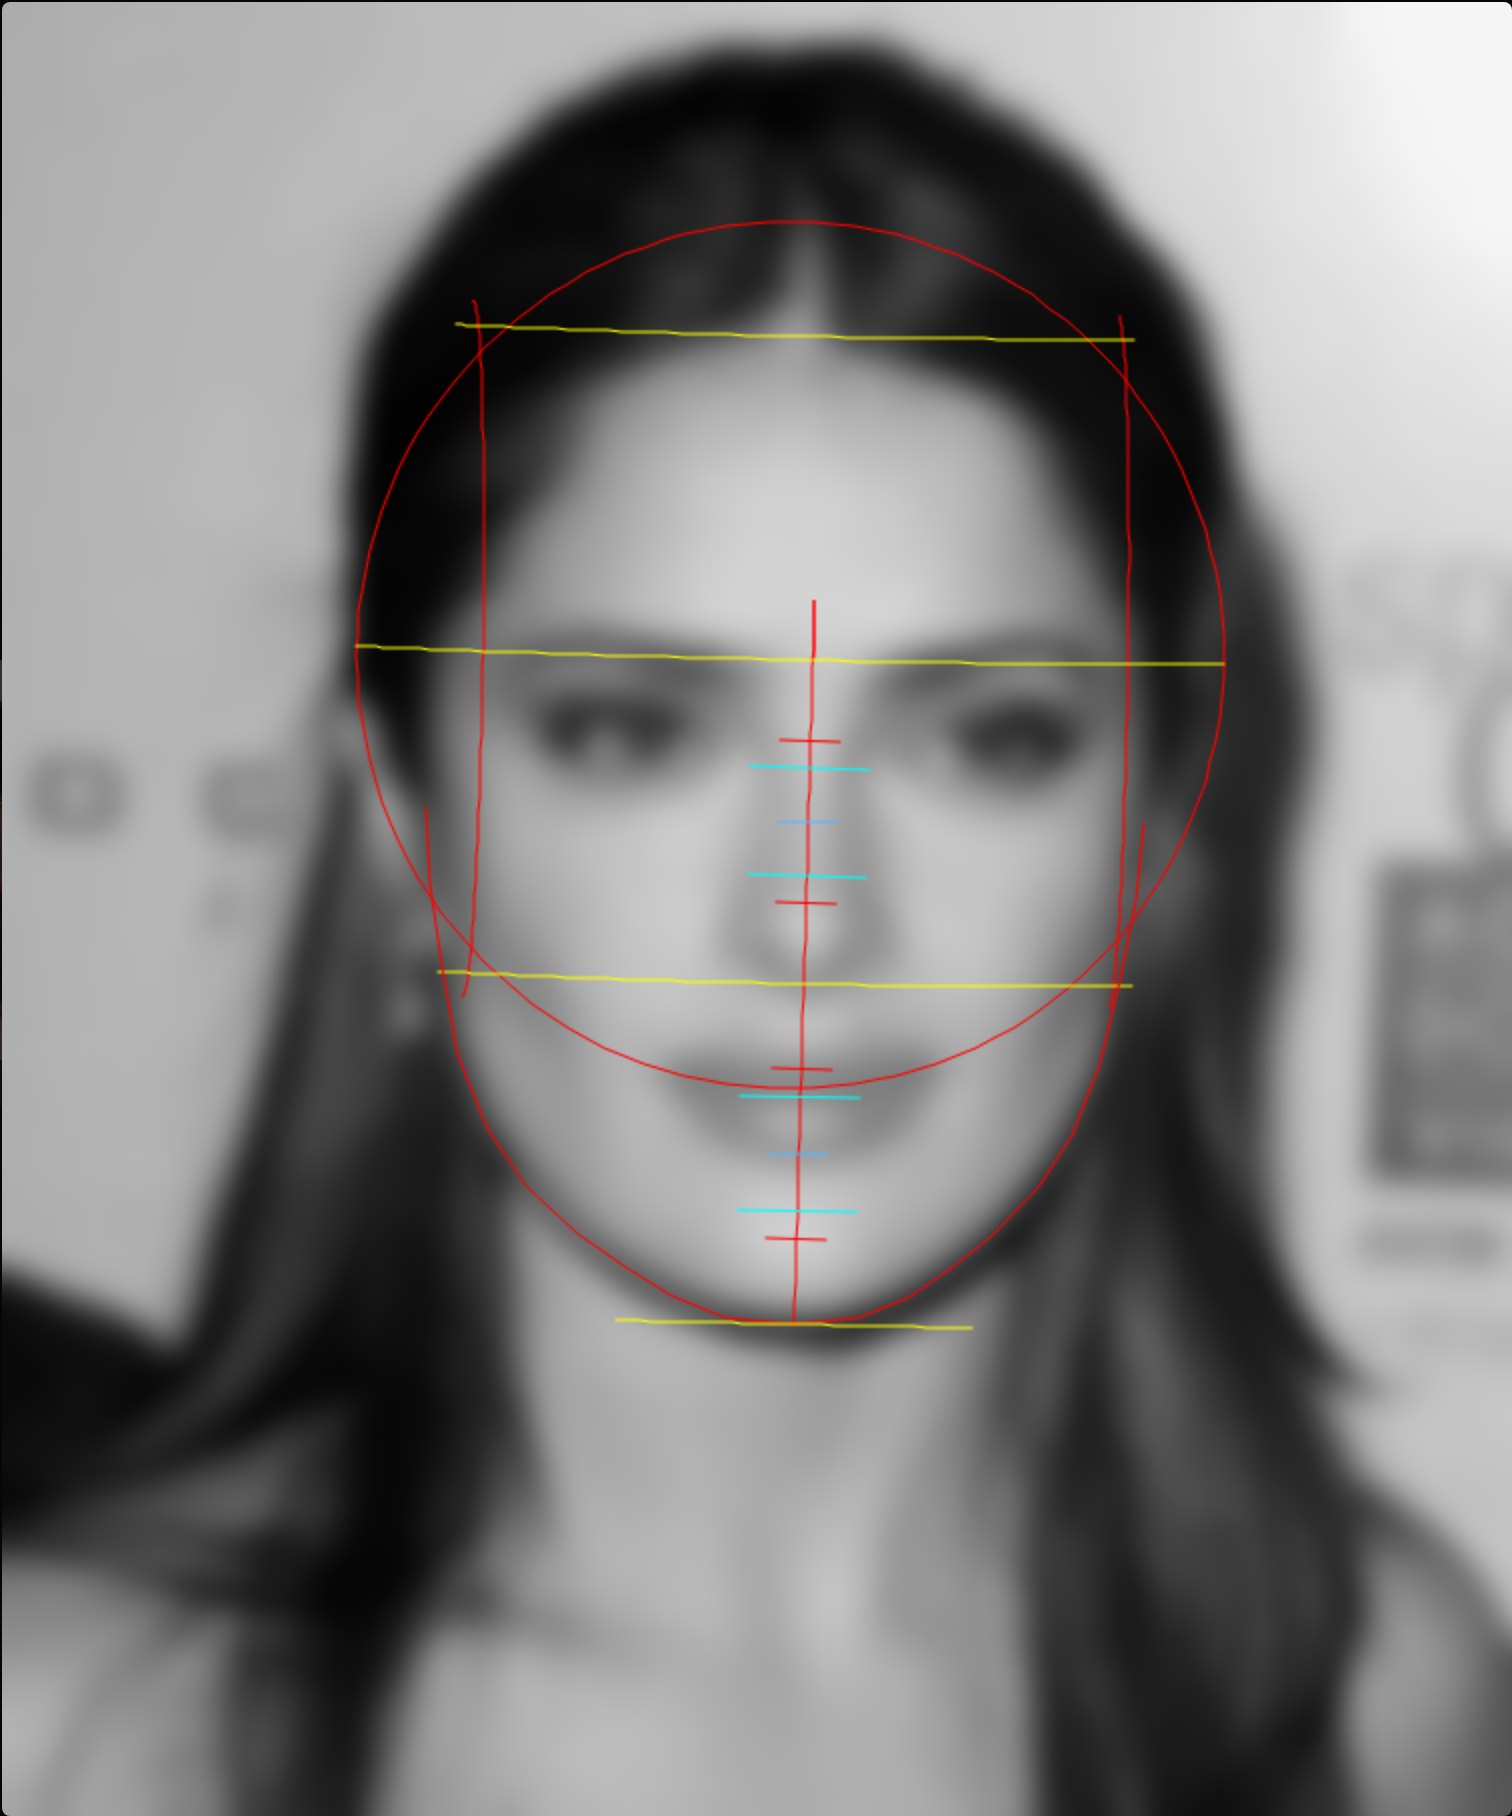
The Loomis method builds the head from a ball with flattened sides: the cranium is a sphere and the flat side planes give you the temples. Through the solid run the centre line and the horizontal brow, hairline, nose and jaw lines. Loomism fits this construction to the photo — the horizontal lines curve with the head's pitch, so they stay true to the perspective.
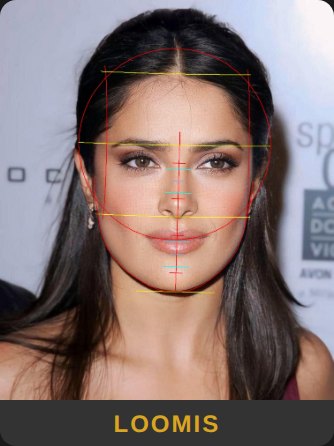
The vertical axis is subdivided along two spans — brow to nose and nose to chin — with quarter and third ticks, so you can check that the eyes, nose and mouth sit at the right heights.
3.2 Reilly
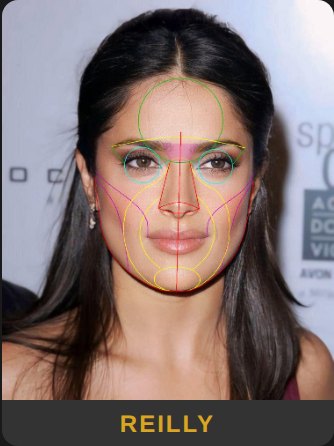
The Reilly method describes the face with rhythmic curves rather than solids: the facial ovals, the eye, brow and nose construction, the cranial arcs and the undercheek rhythm. Where Loomis gives you structure, Reilly carries flow and likeness — which is why the two complement each other.
3.3 Proportions
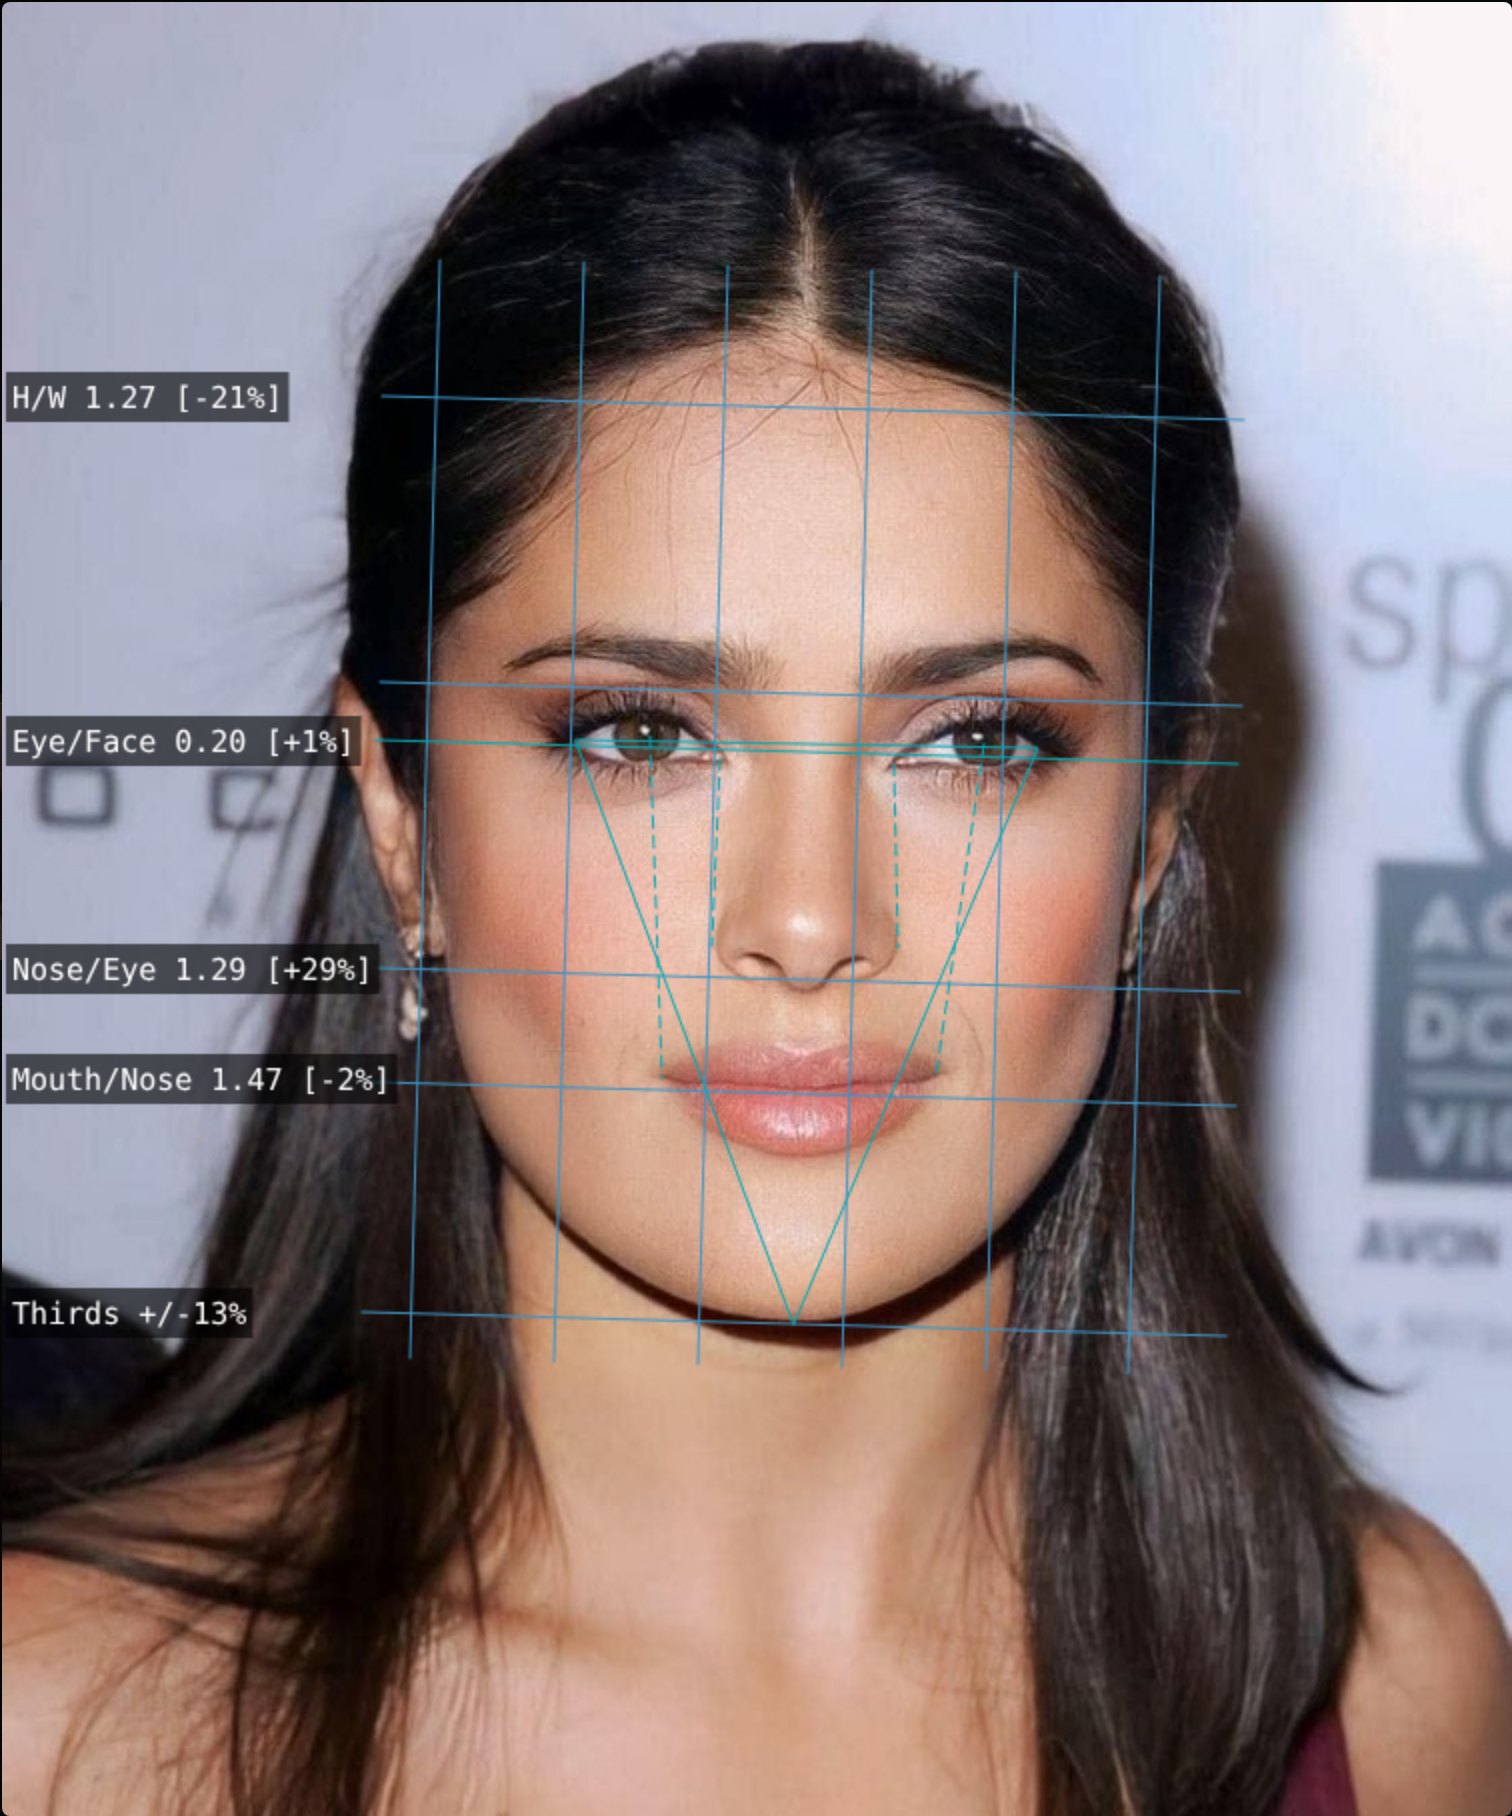
The proportions overlay measures the classic drawing rules: the rule of thirds, five-eye-width spacing, alignment lines and numeric ratios (height to width, eye to face, nose to eye, mouth to nose). Use it to check whether the proportions in the photograph — or in your drawing — match the canon.
3.4 Combinations
The L + R and All cards show the methods layered together. The last card, Print Preview, is the construction alone without the photograph — ready to print and draw over.
4. Full-screen preview
4.1 The MENU panel
Clicking any card opens the image at full size. A draggable MENU panel sits on the right with collapsible sections: Themes, Image, Profile, Editors, Methods, Regions, Grid and Help.

4.2 Thickness, colour and opacity
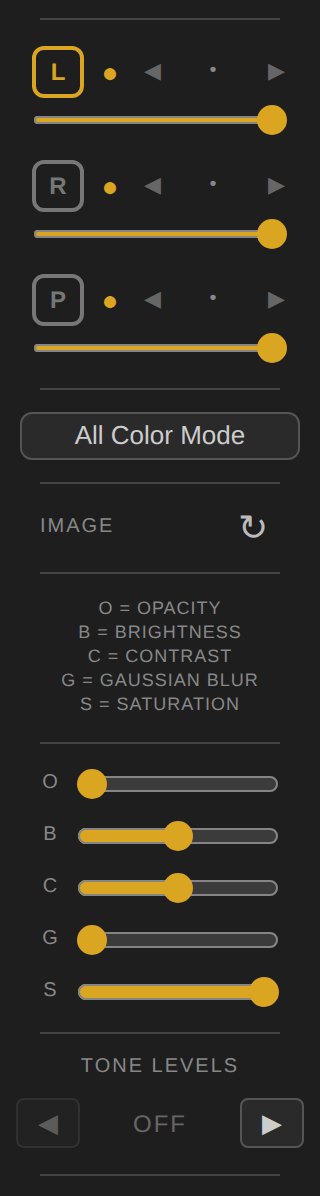
The Methods section holds separate controls for each method: L (Loomis), R (Reilly) and P (Proportions). Each has a visibility toggle, a colour swatch, arrows for line thickness (1–5) and an opacity slider. The All Color Mode button switches everything between colour and black.
4.3 Zoom and panning
The scroll wheel or the + / Z keys zoom in, − / X zoom out, and 0 or C return to the original scale. While zoomed, drag with the mouse to pan.
5. Photo adjustments
5.1 The O / B / C / G / S sliders
Five sliders affect the photograph only — the construction lines, the grid and the regions are left untouched.
| Slider | Effect |
|---|---|
| O — Opacity | Fades the photo towards white. At maximum only the lines remain on a white ground. |
| B — Brightness | 0 = black, 100 = unchanged, 200 = double brightness. |
| C — Contrast | 0 = flat grey, 100 = unchanged, 200 = high contrast. |
| G — Gaussian Blur | Up to 16 px of blur. Loses skin texture and detail, leaves masses and values. |
| S — Saturation | 0 = black and white, 100 = full colour. |
The processing order is B/C/S → G → Tone Levels, so brightness, contrast and blur decide where the tonal steps land. The ↻ button returns the whole block to the untouched photo.
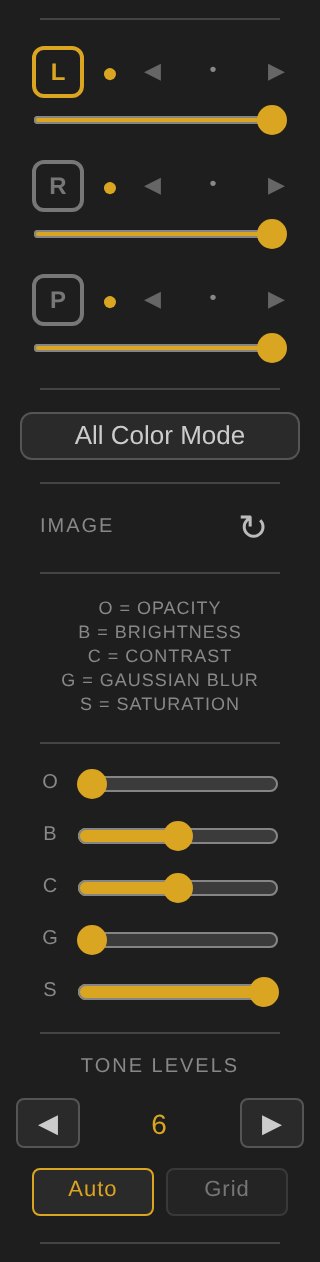
5.2 Tone Levels — Auto method
Tone Levels reduces the photo to a chosen number of tonal steps (from 2 to 16) instead of a smooth ramp. This is the key tool for a value study: a blurred, desaturated photograph broken into a handful of steps shows at once where the lights, halftones and core shadows sit.
For shading a drawing this is invaluable — instead of guessing how dark a passage should be, you see it assigned to a definite rung of the scale. Four or five steps match the value scale commonly used in pencil work, so you can carry them straight over to paper.
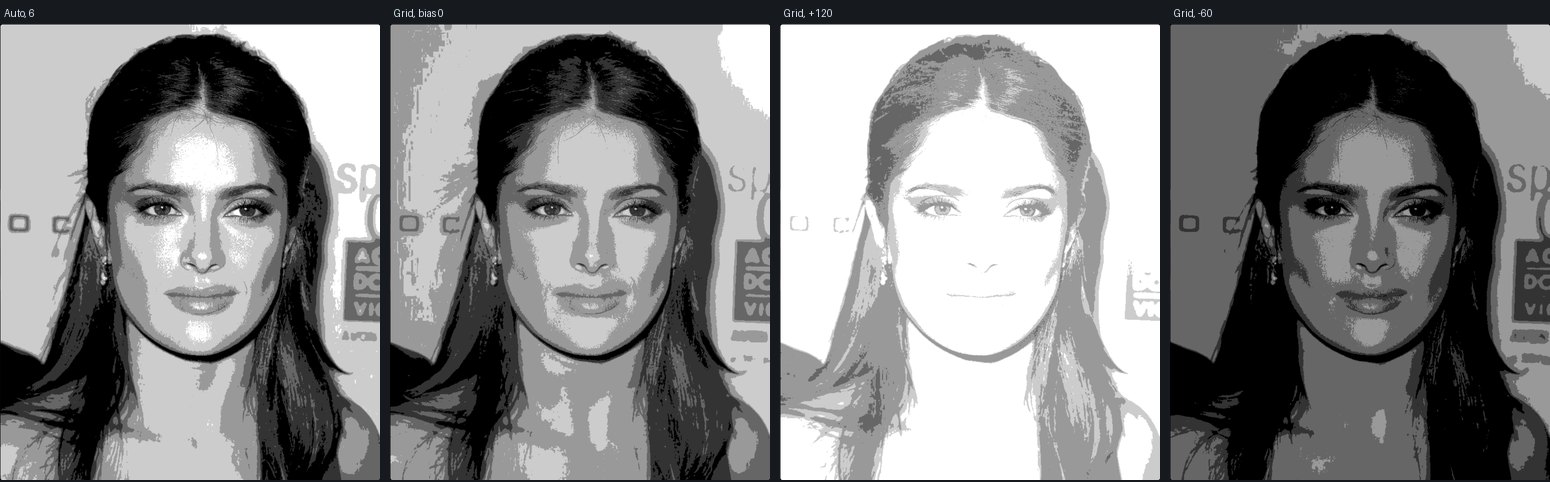
The Auto method reads the photo's histogram and places the thresholds where the pixels actually are, so every step carries a real part of the image. It is the safe default.
5.3 Tone Levels — Grid method and Bias
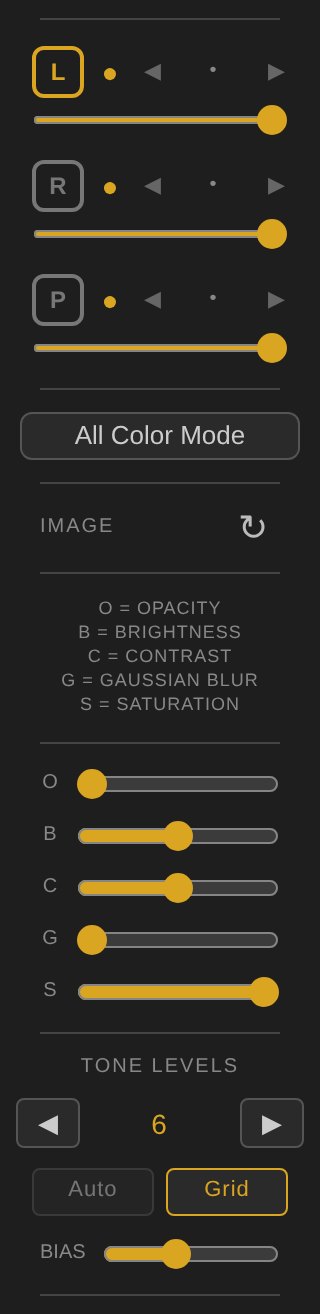
The Grid method spaces the steps evenly from black to white, paying no attention to the photo's content. On its own it would be the poorer of the two, but it works together with the Bias slider, which slides the photo along that ladder before the steps are applied.
Bias behaves like exposure. Pushed up it blows the light passages out to white until only a line drawing is left — a good under-layer for a linear sketch. Pulled down it sinks the darks into a single black mass, leaving a silhouette with a few highlights: a study of how the shadows are arranged.
In practice it gives you control over which part of the value scale you are working on: to work out the pattern of light, push the bias up; to study the drawing of the shadows, pull it down.
5.4 The swatch column
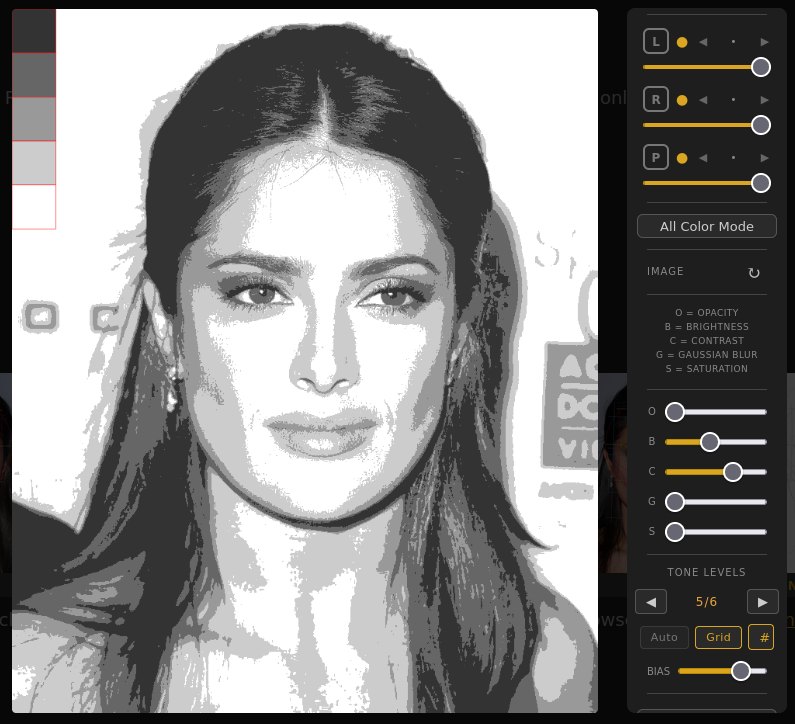
Flattening a photograph into six greys tells you the values are there, but not which grey any given patch is. The # button next to Auto and Grid — or the / key — draws a column of squares down the top left corner of the photo: one square per tonal step, darkest at the top, painted in the exact greys the steps use. Hold a square against a passage of the photo and you can read off its value directly, which is what you need when you come to mix the same value in pencil or paint.
The column lists only the steps that are actually on the image. Brightness and Contrast are applied before the tonal pass, so they can squeeze steps out of the photograph altogether: a setting of six may really be five, or two. When that happens the column shortens to match and the stepper reads 5/6 in amber instead of a plain 6. Treat the divergence as a reading — it says the sliders have flattened part of the scale away, which is easy to do by accident and otherwise hard to notice.
6. Sphere Editor
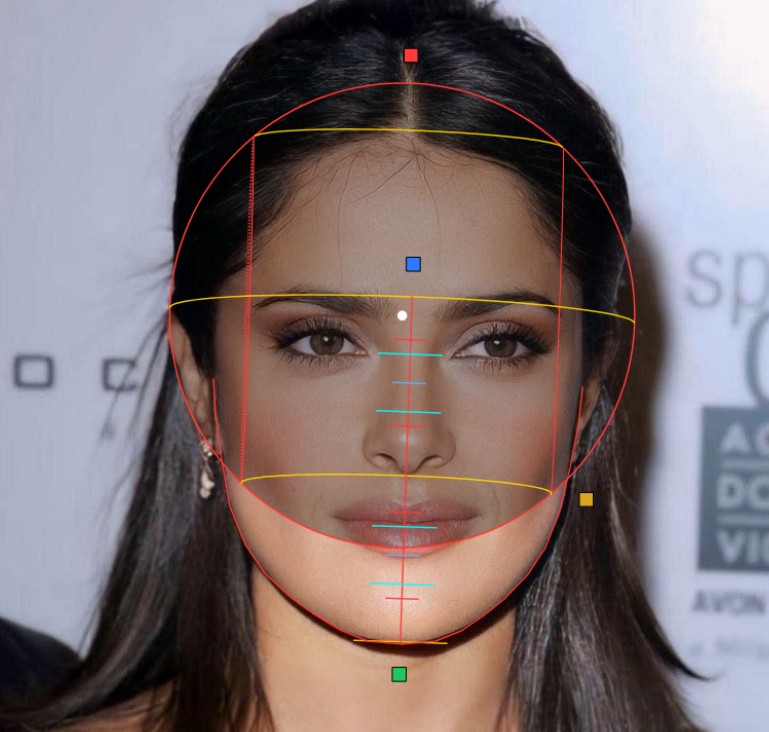
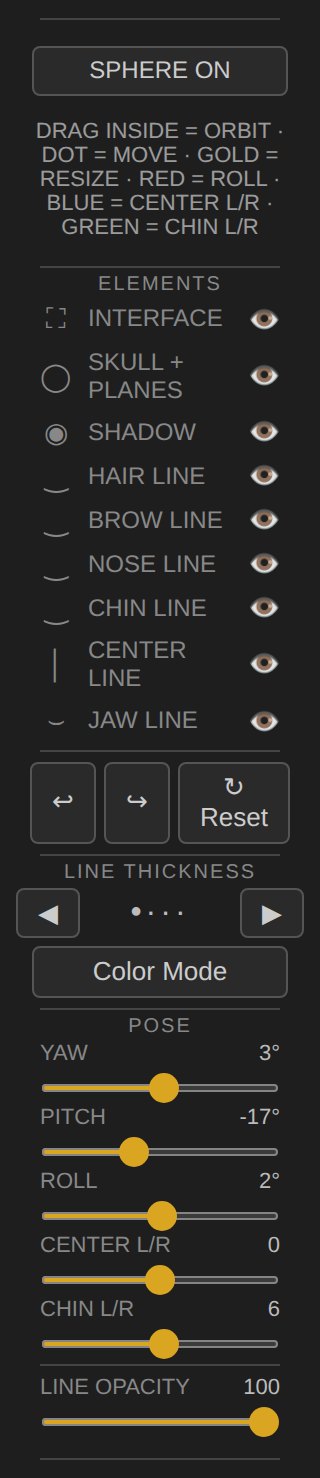
The Sphere Editor gives you an editable Loomis ball, seeded from the detected head pose. Turn it on with the button in the Editors section or the O key; while it is on it replaces the automatic Loomis layer, and switching it off restores the previous state.
Drag inside the solid to orbit it; the handles around the rim control the roll, the centre line and the chin. The panel lists the elements with individual visibility (skull, shadow, hair, brow, nose, chin, centre line, jaw, dot lines), pose sliders, an undo history, and line thickness and opacity.
Dot lines is the one element that starts switched off, because it is an extra rather than part of the Loomis construction proper. Turn it on with the ; key or the DOT LINES element, and dashed rings appear at the brow→nose divisions, running parallel to the brow line and coloured to match the solid marks — red for the quarters, azure for the middle one, cyan for the thirds. They wrap the head like hoops, so on a tilted head you can read the divisions as bands around the form instead of as isolated ticks. The element is independent of the centre line: hiding the axis leaves the rings in place.
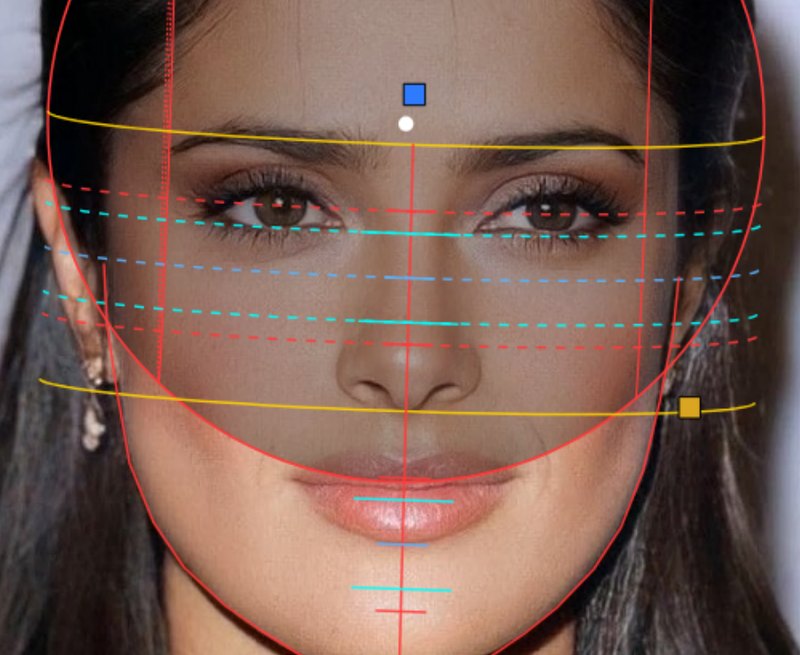
This is the rescue tool for photos the detector gets wrong — a head tilted far back, for instance. Set the ball by hand and the construction agrees with the face again.
7. Manual Grid
Manual Grid is a different way of drawing. The Sphere Editor and the Loomis or Reilly methods lead the construction — they tell you where the cranium sits and how the rhythms of the face run. Manual Grid leads nothing: you box the head in and let the grid itself carry the proportions. It is the classic technique for copying from a photograph, familiar to anyone who has ever squared up an image by hand.
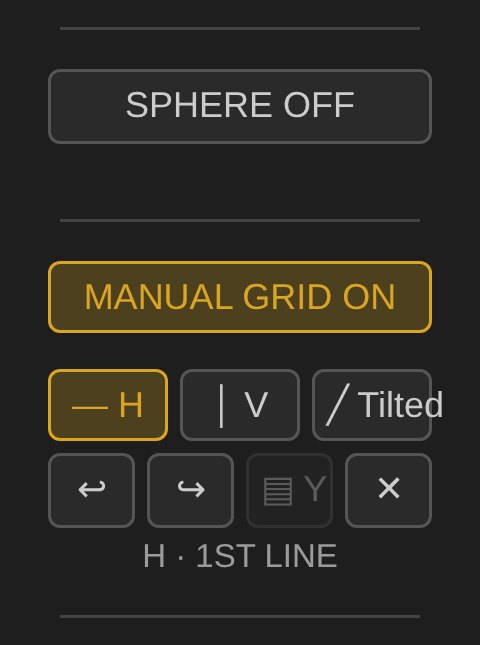
Switch it on with the MANUAL GRID button in the Editors section, or simply press H or V — the key opens the editor by itself. It works alongside the Sphere Editor, so you can lay a grid over a ball you positioned by hand.
7.1 Boxing the head in
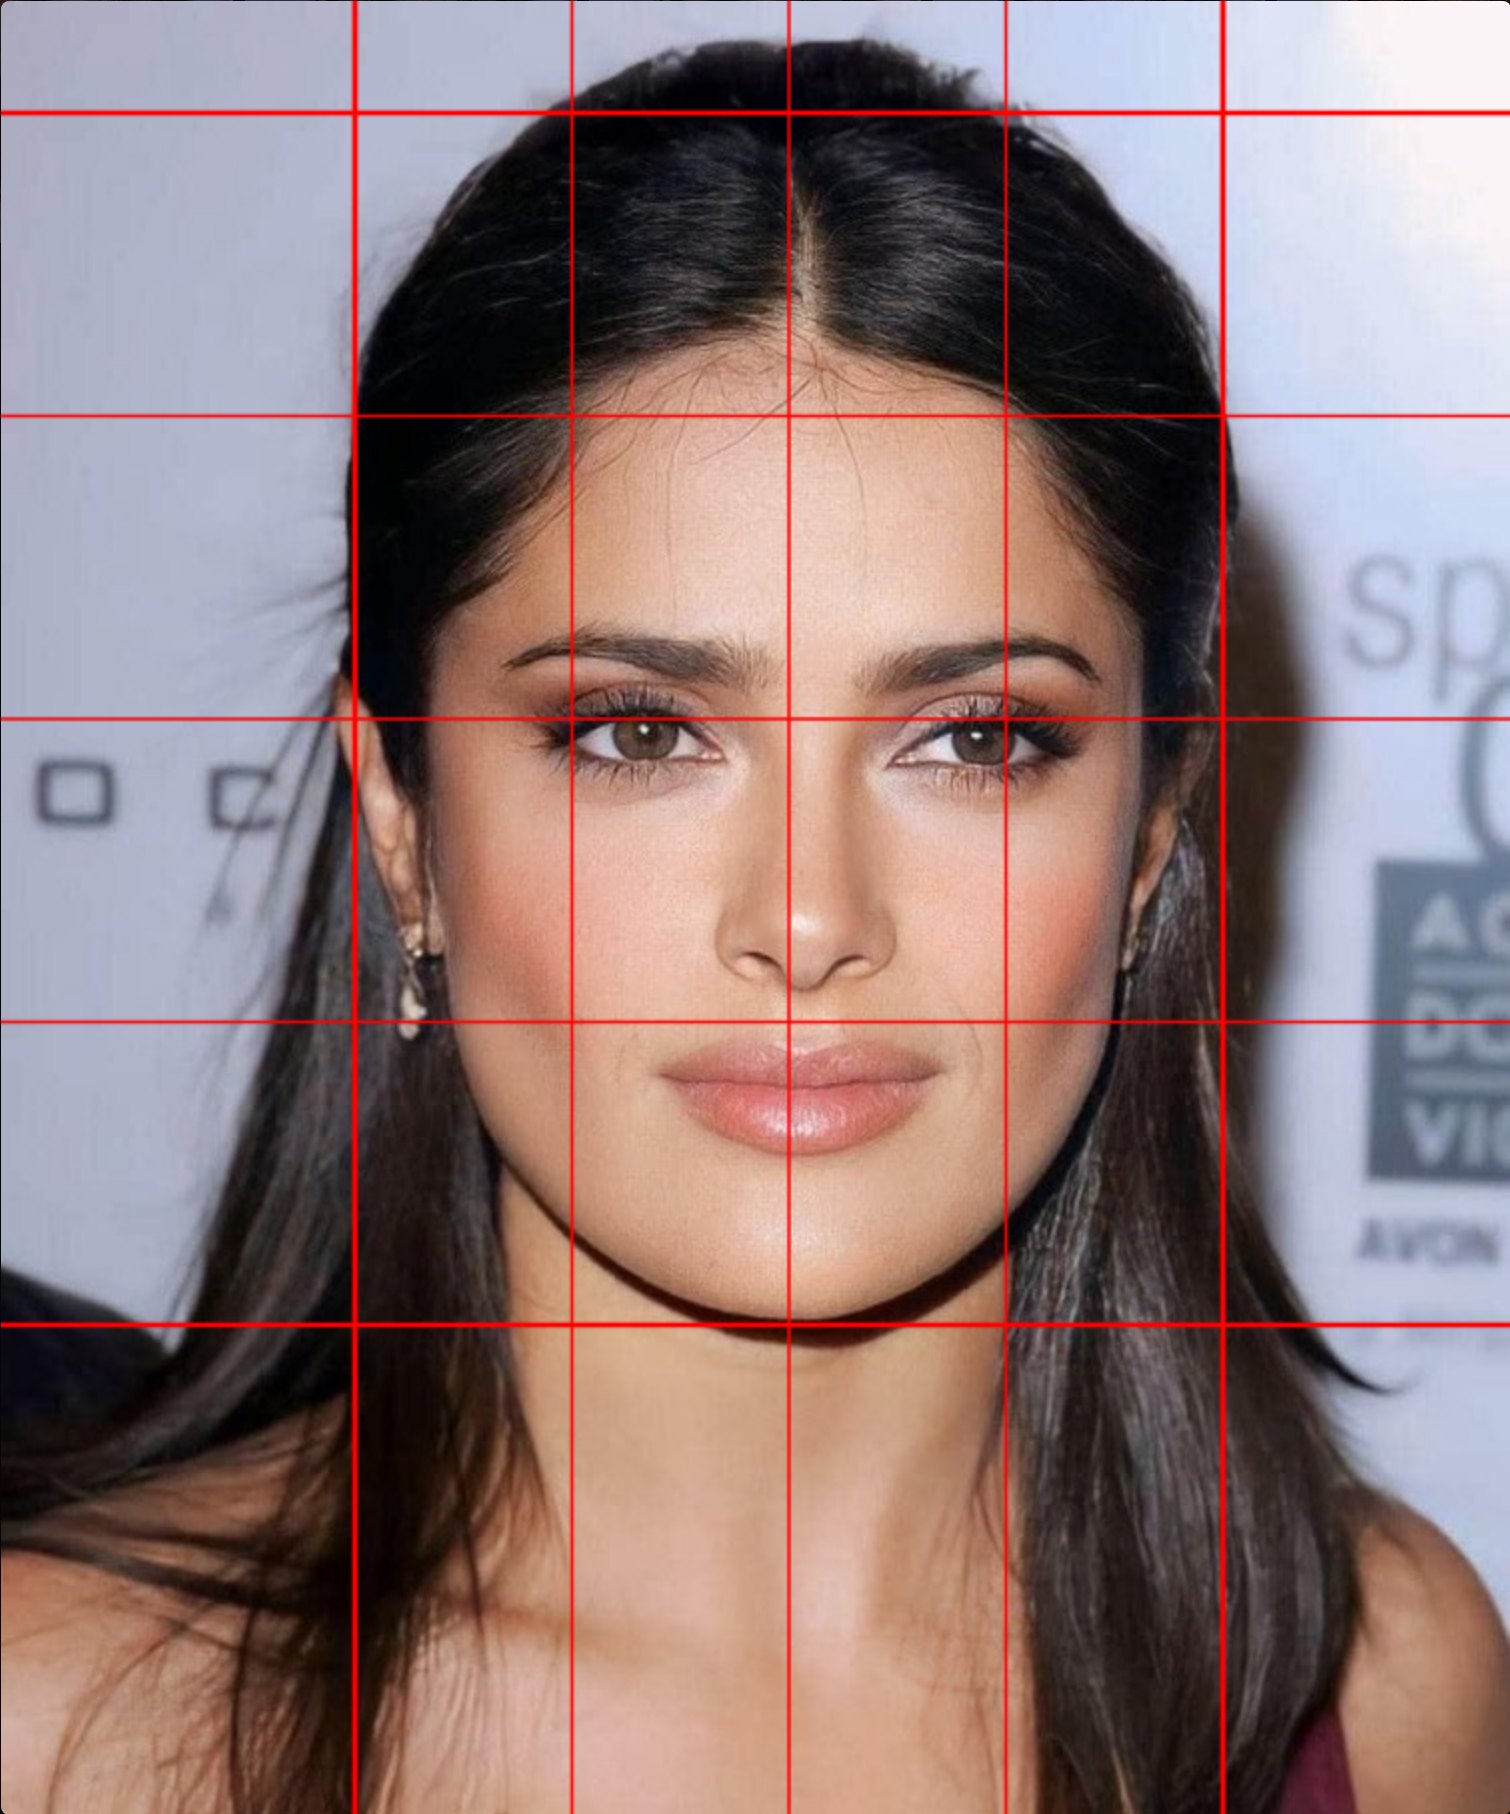
The H key places horizontal lines, V vertical ones. Each pair takes two clicks — the first sets one boundary, the second the opposite. In practice the most useful box encloses the whole head: the top of the skull along the top, the bottom of the chin along the bottom.
The sides are a matter of taste. Some people run the lines along the outer silhouette of the hair, others along the contour of the skull itself, ignoring the hairstyle. Both conventions are fine — what matters is staying with one throughout the drawing, because it sets your reference width.
Once both pairs are down, each is divided into quarters automatically. The result is a 4×4 grid: the head halved, and each half halved again. Those lines alone already say a lot — the eyes usually fall on the halfway line, and the central vertical shows whether the face sits off-centre.
7.2 Angle: with the head, or square to the page
The ╱ Tilted / ─ Level button decides the angle the lines run at. In Tilted mode the grid leans with the head — it agrees with the model, which makes it easier to compare where things sit relative to the face. In Level mode the lines are perfectly horizontal and vertical, that is, square to the page: this is the grid that transfers to paper most easily, because you draw an ordinary squared grid with a ruler.
The choice locks once the first line is placed — otherwise half the grid would sit at one angle and half at another. If you change your mind, clear the grid and start again.
7.3 Subdividing and values
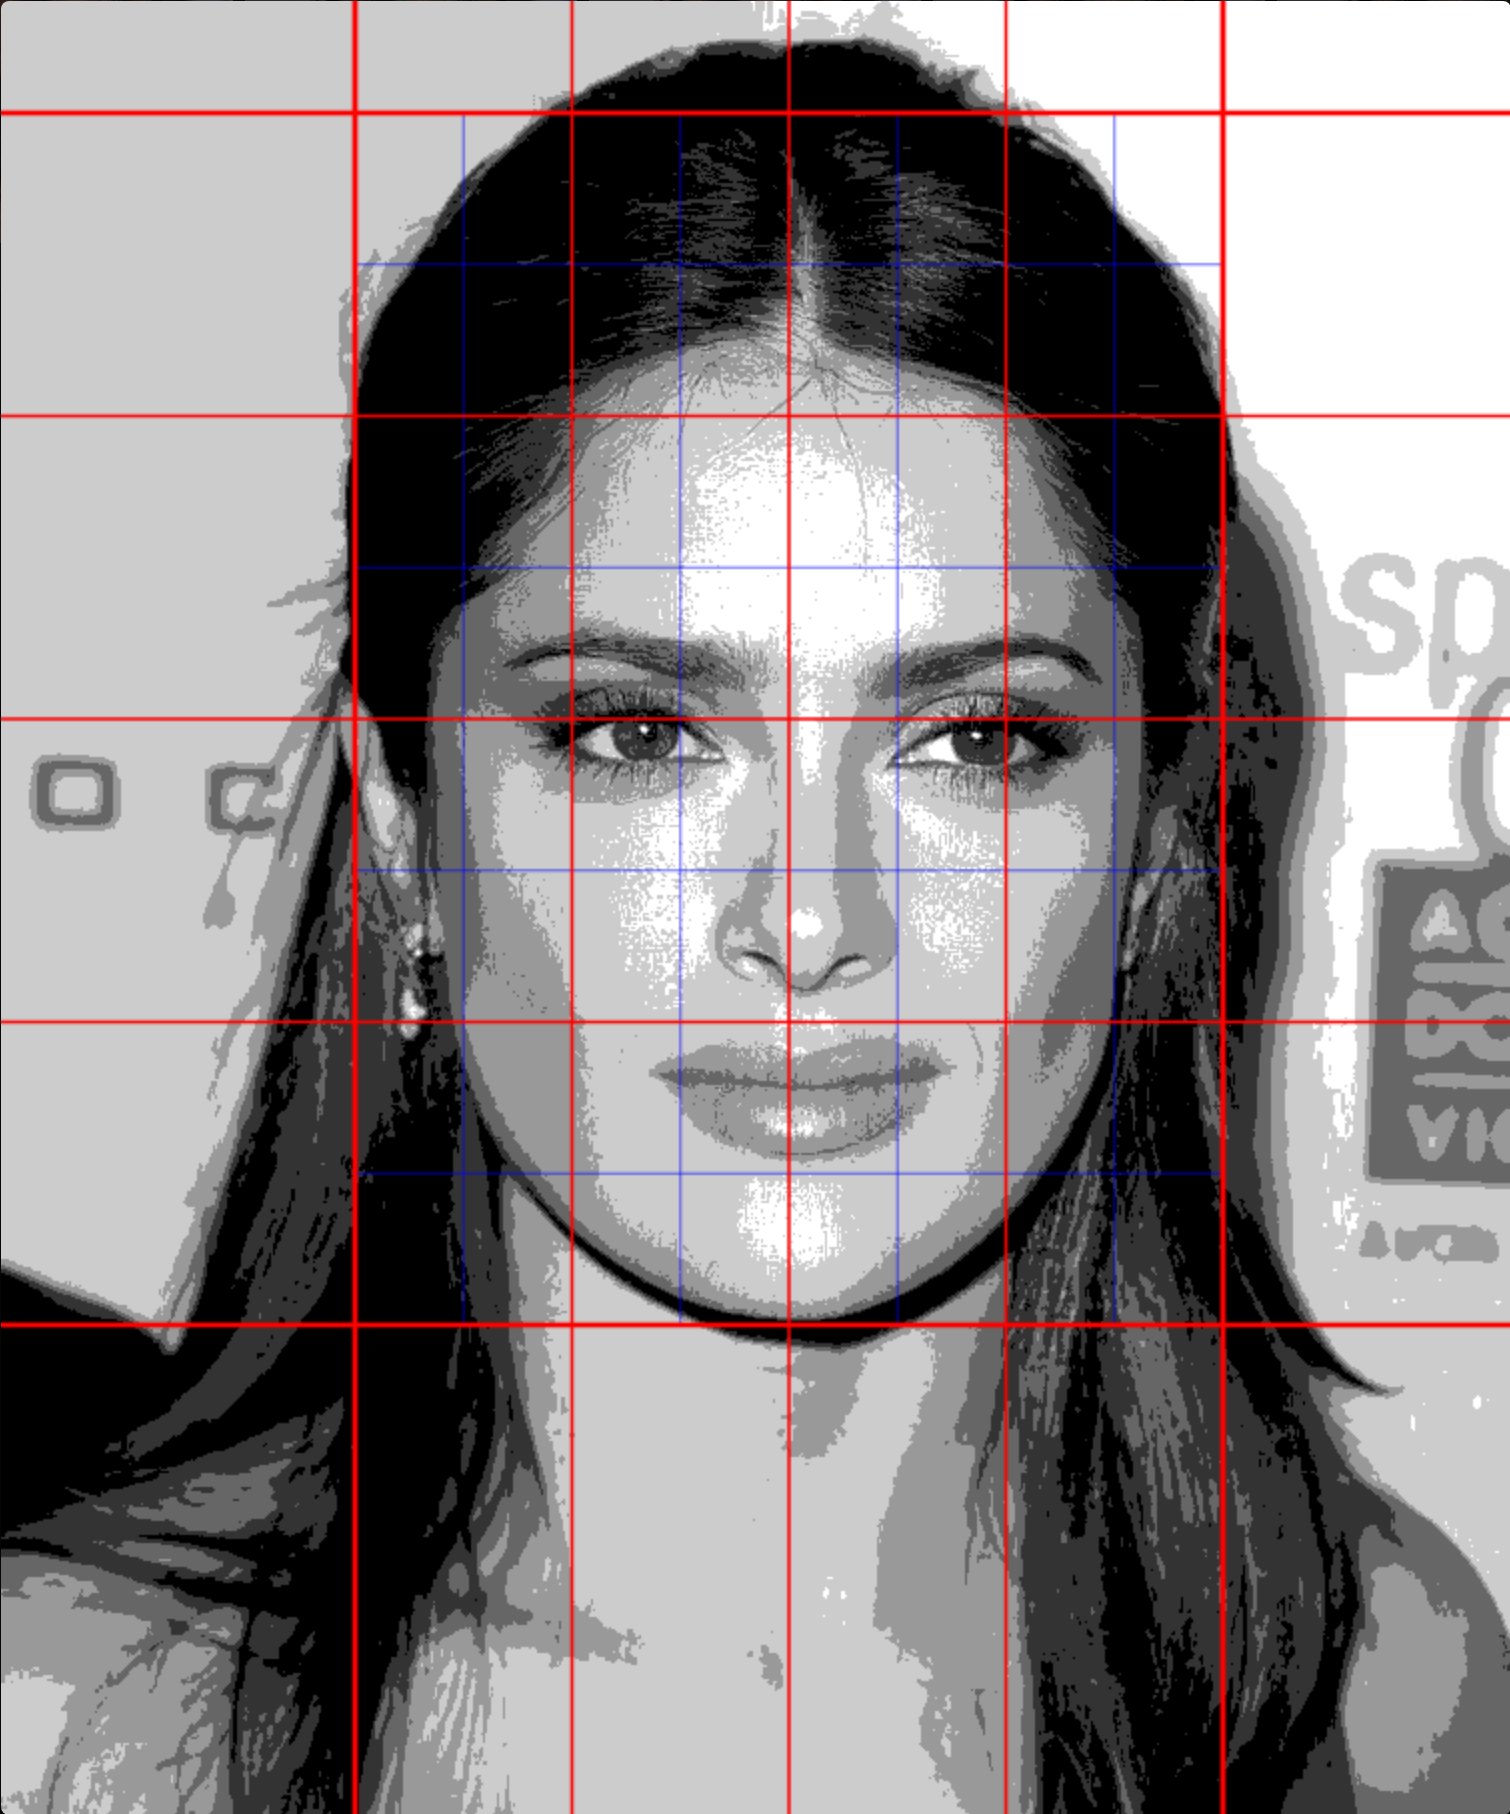
Four squares across can be too coarse for detail. The Y key subdivides the finished grid: 8×8, then 16×16, and a third press turns the extra divisions off. The new lines are drawn in different colours from the red box, so you can always tell which level a division belongs to.
It is worth pairing Manual Grid with Tone Levels (chapter 5). Flattened values reduce the photo to a handful of plain patches of grey, and the grid gives them borders — within a single square it is very easy to judge whether one patch is lighter or darker than its neighbour. This is the working setup for shading: first you transfer the proportions square by square, then you fill in the values the same way.
The B and N keys undo and redo whole pairs of lines. The ✕ button, or Escape, clears the grid and closes the editor.
8. Face regions
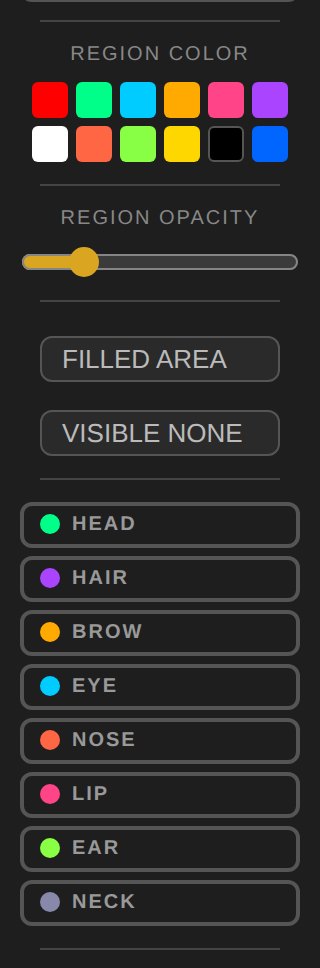
The Regions section (the M key) isolates areas of the face — eyes, brows, nose, mouth, skin, hair — so you can highlight them separately. Each region has its own toggle, a colour from twelve palettes and an opacity setting. Filled mode shows solid shapes, outline mode just the contours.
It helps when studying how the face divides into masses, and when planning which passages should read darkest.
9. Cropping, saving and printing
The Image section holds the actions that apply to the whole picture.
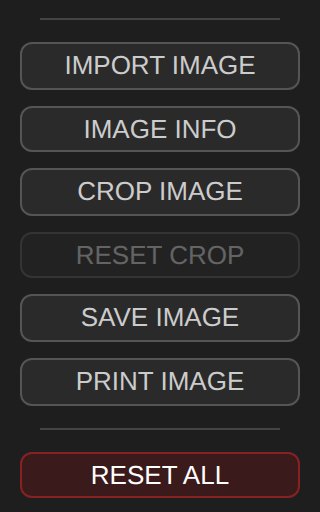
| Button | Action |
|---|---|
| IMPORT IMAGE | Loads a new photo; closes the preview and opens the file picker. |
| IMAGE INFO | File name, dimensions, size, megapixels and aspect ratio. Updates after a crop. |
| CROP IMAGE | Crop mode — draw a rectangle and the photo is cropped and re-processed. |
| RESET CROP | Restores the full photo. Lit amber while a crop is active. |
| SAVE IMAGE | Saves a JPEG with the visible layers and the grid. |
| PRINT IMAGE | Print preview in three variants: the full image, the image with a clean thumbnail in one corner, or the thumbnail alone on a blank page. |
| RESET ALL | Returns every setting to its default. Does not delete a saved profile. |
10. Setting profiles
The Profile section stores the current preview settings — visible methods, thicknesses, colours, opacities, grid and regions — in the browser. SAVE PROFILE stores them, LOAD PROFILE brings them back. A profile survives closing the browser and applies to any photo, so a set-up you like can be reused on every new reference.
11. Keyboard shortcuts
| Key | Action |
|---|---|
| 1 / L | Loomis layer |
| 2 / R | Reilly layer |
| 3 / P | Proportions: off → grid → grid with labels |
| O | Sphere Editor |
| H / V | Manual Grid — horizontal / vertical line |
| Y | Manual Grid — subdivide the grid (8×8 → 16×16 → off) |
| B / N | Manual Grid — undo / redo a pair of lines |
| ↑ / ↓ | Line thickness of the active layer (1–5) |
| G | Reference grid |
| S / A | Grid density: more / less |
| W / Q | Grid colour: next / previous |
| + / Z | Zoom in |
| − / X | Zoom out |
| 0 / C | Reset zoom |
| M | Regions section |
| Escape | Close the preview or a dialog |
Try it on your own photo
Upload a face photo and get the construction lines in a few seconds. Free, no signup.
Open Loomism